Pages

Friday, September 7, 2012

Variegated Chunky Yarn

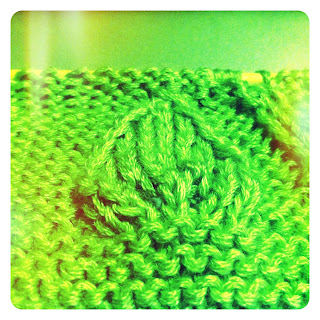
My sister and I were talking about yarn yesterday. She bought a fun, variegated, chunky yarn to make a scarf for a friend. She has tried a few knitting patterns and cant seem to love any of them. I had this problem a few weeks ago when I wanted to knit a scarf with the yarn shown above. I had invested about $80 in this yarn and I wanted the scarf to look amazing. I tried knitting several different stitches, but it seemed like the stitches were so small that they took away from the beauty of the different colors. 

Finally I pulled out a crochet hook and just crocheted it length wise in a half-double-crochet (HDC or hdc). I was amazed it worked and it is lovely. I am trying to convince my sister to get a crochet hook and start crocheting again. See, back in high school we both used to crochet, but she was always so much better at it. She had a very even, consistent hand whereas mine was literally a mess. Ah, how the tables have turned. After a few years of practice, I mastered crocheting even and beautifully. Now to convince her to get back to it with her naturally beautiful crocheting skills...

Saturday, August 25, 2012

Creamy Ranch Pasta Recipe

I apologize for my absence, but I'm back now! Classes starting threw my schedule off. I feel pulled in a million directions... good thing God can handle it!

Anyways, recipe-

Creamy Ranch Pasta Recipe-

Ingredients:
1 8oz package Cream Cheese
1 1oz Packet of Hidden Valley Ranch Salad Dressing & Seasoning Mix
1/3C Sugar
2C Small Shell Pasta Noodles
1C Frozen Peas
Bacon Bits
Italian Style Bread Crumbs
Fresh Parmesan Cheese

Method:
Using a hand mixer, blend together the Cream Cheese and Ranch Seasoning Mix until smooth then add sugar, blend well. I added a few tablespoons of milk to make mine a touch softer. Cook your noodles in a medium pot of boiling water until they are your desired texture. Place frozen peas in your strainer and pour the pasta noodles and water over the peas (this is how I thaw mine). Rinse with cold water until cool. Stir your noodles into the cream cheese mixture. Grate Parmesan Cheese over the pasta and stir in. Grate a little extra for the top. Spread some Bacon Bits over the top and follow with your bread crumbs. Refrigerate or serve immediately. Serve cold. Approximately 10 servings.

Wednesday, August 15, 2012

What Inspires Me right Now


 1. Knitted Evening Clutch Bag 2. Teal/Gold Handspun yarn 3. Knitted Turquoise Dream Journal 
4. Letter Writing 5. Wee Birdy Embroidery 


Knit & Crochet Stitch Marker Tutorial

I've been wanting some knitting stitch markers for a long time. Since I go from knitting to crocheting frequently I figured why not make one with a clasp at one end and a ring at the other? These handy little markers can be clipped to crochet work or placed on a knitting needle very easily. 

All the items found below can be found at your local Hobby Lobby or craft store of choice. If you can't find them locally, there are many great online shops to order your materials from. Lucky for me, my mom used to be really in to making her own jewelry. Even luckier for me, she didn't do it for long, but she kept the giant tote packed full of her supplies. 
 What you'll need:
Eye pins- I used 2"
Jump rings- the size of this ring depends on the needle you plan to put it on
Beads- be creative, use what speaks to you!
Jewelry pliers- 2 pairs
Lobster clasps

I chose to make a set of 6.
After your supplies are gathered, decide how you want them to look and place the beads on the eye pins.
Carefully, but firmly bend your eye pin over by holding with one pair of pliers to the opposite end of the "eye" of your eye pin and twisting the wire with your other pliers.

Mine looked like this.

After this you take the tail end of your wire and wrap it around the base of the bottom bead. I apologize for not taking a photo of this- but I haven't mastered holding two small pairs of pliers and taking a photo at the same time!

Next you want to open your jump ring by carefully twisting it with your pliers. 

Loop the jump ring through the eye of your eye pin and twist it shut.


Repeat as many times as you want.

If you have any questions of comments please feel free to comment! I hope you enjoy making your very own stitch markers! I would love to see picture of your creations!

Tuesday, August 14, 2012

Inspiration Close to Home

Every now and again it helps to put down your yarn and take a walk to feel inspired again. 

The colors and textures around our farm are outstanding. From this old swing set on the left to the old windmill on the right.

How yummy is the color of this old water heater tank, and the gorgeous blue of this old Chevrolet truck?

 Have you taken a walk around where you live to seek out the hidden beauty? It can be very easy to just move around and past so much beauty that is literally right in front of our eyes. Slow down. Breathe. Take in your surroundings. You may be pleasantly surprised by what you find!


Thursday, August 9, 2012

Beanie for a Bambino

Someone texted me a picture challenging me to make a baby hat like the one in the picture. Challenge? Psh. Don't threaten me with a good time.
I used some Caron Simply Soft yarn and a 6mm crochet hook. Crocheted up a simple "butterfly" beanie. This little hat would be a great last-minute baby shower gift. Can't you see a beautiful photography session happening...?

The focal point is obviously these adorable little flowers. They aren't exactly like the ones in the picture I received, but I liked how these turned out.

For these flowers I:

Ch 15-17
DC in 2nd chain from hook then DC in each chain to the end, tie off.
Roll the chain and sew the tail in to hold the flower in shape. 

I sewed on a few glass pearl-like beads.

Simple. Adorable. Fast.


Want to buy one? Check out my Etsy Shop

Wednesday, August 1, 2012

Double Knitting

So I've wanted to learn to double-knit since, well, a few days ago. I was asked to make anything with a "triquetra" symbol on it so I thought a beanie would be nice for this particular person. The beanie would be even better if it were reversible. I thought there would be a pattern out there for this symbol, but I came up with zilch. Nothing. No fun color work pattern to turn into a beanie. 

Anyways I was listening into on the Marly Bird Podcast featuring Alasdair Post-Quinn who is the author of "Extreme Double Knitting" (which is available through Cooperative Press). Whew that was a lot of links! If you aren't familiar with "Yarn Thing" podcasts by Marly Bird, you should definitely check them out. I enjoy listening to things while I knit and this podcast is exactly what I needed. She does a live show every Tuesday at 11am central time. Also if you haven't seen Alasdair's work, get to his site ASAP and look at his amazing color work. You can also find him on Ravelry as fallingblox

I know my first swatch double knitting is definitely not comparable to Alasdair's work, but I do feel proud that I did it! To be honest, I'm pleasantly surprised by how easy it was do to! Now making my stitches consistent and turning this idea into a reversible beanie is a whole different story. If I pull this off, I will definitely share the pattern. 
Front

Back

It's lookin' like rain today!

The sky is dark and the wind is blowing. I am praying this isn't a cruel joke. Being a farmer's wife means that rain takes on a whole new meaning. No rain=bad harvest in the fall. This summer has been dry save for a few intermittent showers and today would be a fantastic day for it to rain.


Being a knitter means that I enjoy rain for the simple fact that it's soothing and the perfect weather for knitting, other than snow of course.

I crocheted this little hat last night for a cousin. I get the biggest joy out of receiving a picture and having someone ask me if I can make it. I have to make a few flower type embellishments to put on it. This "butterfly hat" was super fun to make. I just wish I had a baby to use for photographs! 

Sunday, July 29, 2012

a few hidden treasures.

Looking for yarn in the Little Apple? Look no further!


First and foremost we have the Wildflower Yarn and knitwear located at 300 Poyntz Avenue in Manhattan, Kansas. This shop is ran and owned by Kennita Tully who is a knowledgable and friendly woman that won't mind you standing and gawking at the yarn for an hour or more in my case. :) Her hours are pretty great. She is open from Tuesday-Saturday 10am-5pm and she is open until 8pm on Thursdays. 


Another fun place to visit is one I just learned about. The Wicked Stitch Yarn & Fiber is located in downtown Wamego, Kansas at 523 Lincoln Street. This lovely little shop is owned and ran by Jennifer Schermeerhorn. If you are interested in learning to spin your own yarn this shop is definitely the place to go. Her summer hours are Thursday-Saturday 11am-4pm. The first Wednesday of every month they have a social gathering at 7pm where knittings, crocheters, etc are invited and welcome to go hang out. If you are free go check in out this Wednesday evening at 7pm. Her website says 6-8pm, but I swore she told me 7 so I'm not entirely sure on that... great blogger huh?

Friday, July 27, 2012

no kids, nope

My two wonderful children are off to Gramma's house for the day and night. To be honest I am a little lonely without them, but I plan on taking full advantage of the solitude. Lunch with my sister for some Chinese I know I'll regret later and then I plan to hit up my favorite local yarn store, Wildflower Yarns on Poyntz.


Am I the only person who absolutely loves buttons? I love them enough that I decided to hot glue a pair of buttons to some earring studs. Cheap, easy, && so adorable. Unfortunately my sensitive ears will not allow me to wear them longer than a minute before the heat and itching sets in. I need to invest in empty gold studs so I can actually wear these little cuties. I mean- jeepers- I have no hair to block the view of these bad boys so I need to wear them before my hair grows back!

Have a wonderful Friday everyone and be safe this weekend!

Thursday, July 26, 2012

Continental Vs. European Knitting


There are two main different styles of knitting and each style has about a million variations to it. There really is no right or wrong way to knit. Recently, as in last evening, I decided to try and learn the Continental style of knitting as I have been doing the European style. 

Basically in European knitting your yarn is being "thrown" over by taking your right hand over the left hand needle (for righties of course). Continental knitting is where your yarn is kept in the left hand and basically pushed over your needle using a finger which is also known as "picking."


I am trying my hand at Continental as I said and I feel like I'm a beginner again. I feel like the movement is smoother, but working on teaching my hands to move in a new way is proving semi challenging. I'm hoping to get it down quickly and begin to knit in the Continental method soon.

Wednesday, July 25, 2012

Twirling Yarn in the Park

While the children played in the splash park. I decided to take advantage of their distraction.

There is nothing more satisfying than teaching a sibling to love something you love. While I crocheted a doily, she continued to knit a wash rag for her children's bathroom.

The weather was beautiful under the protection of these trees.

I have to admit my "to-knit" list is getting deliciously long. Ah the afternoons I will spend enjoying the company of my needles while I kindle the fire of my yarn love-affair.

Good Morning


"Really, handknitting is a dreamy activity, built into many people's thumbs and fingers by genes already there, itching to display their skills and achievement possibilities."
- Elizabeth Zimmermann

Is there a better way to start the day?

Tuesday, July 24, 2012

Lost Battle

I want to turn this neck warmer into a table runner by doubling it and then making it long enough for a table.... Who knows if I will ever be able to do it!
I have attempted this pattern several times. Seeing it was one of the reason I got back into knitting. For the life of me I cannot seem to get my hands to do it right without messing it up! 

I did however manage to get further than I did before. I succeeded at making one leaf and leaving a giant hole on the other half. I won't show you the hole- that is slightly embarrassing. Once again I will remove this from my needles and find another project until I get brave enough to tackle this one again. 


Thursday, July 19, 2012

I splurged on some FUN

I have to admit cabling intimidates me, but my goal is to learn! Buying fun new needles by Lantern Moon is a good way to start!

I have been wanting a new needle case because mine was just a tiny crochet hook zip case that was unbelievably stuffed full of all my "stuff"so this impressive piece is not only gorgeous, but completely functional as well.

I am also growing into my new hair do. I keep reminding myself that I. Am. Not. My. Hair. I am still the same beautiful girl I was before. God has shown me that I can be a beautiful person no matter what my outer appearance may be because it truly is what is inside that counts!

Friday, July 13, 2012

Finishing a Doily, Blocking.

When it comes to blocking a doily there are probably as many different ways to do it as there are people crocheting. So here is how I do it. You need something to pin your doily to- I used a piece of foam poster board because it is super inexpensive and easy to replace. I took some clear scotch packing tape and covered the whole front side of it for a bit of waterproofing. 

Then you need starch- I used a spray can.
You also need safety pins

I draw a circle on my board so that I have a general idea of where to pin. Next you want to wash your doily. When it is still wet you start pinning the doily down. I have to angle my pins because I pull so hard.
 Once you are satisfied that your doily is pulled tight and pinned evenly just spray it down with the starch && let her dry.

 Of course if you are anything like me you will be in your bedroom with a blow dryer drying it as fast as you can. After several hours of straight crocheting, I am ready to admire my masterpiece! :)


Once it has completely dried you are free to unpin your doily and fall in love with it all over again!

Wednesday, July 11, 2012

My Favorite Tool

I think every person who has a hobby has a favorite tool. Mine is kind of lame to many people and I didn't grow to love it until I started doing projects with more counting involved. My stitch counter is simple, inexpensive, and makes my crafting a breeze. With two small children running rampant through my home, there is no way I could keep track of where I am in a pattern without my stitch counter. 

What is your favorite tool?

Monday, July 9, 2012

Bridesmaid Dress

So here is the dress. It looks great laying here on the bed, but feels a little too poofy for my style. I'm debating taking it all apart and taking some off the skirt. But I don't know if I have the motivation to basically spend another day taking this apart and putting it back together...

If I decide to wear this in the wedding I will definitely take it apart and remove some of the fabric from the skirt part. My friend has a grey dress that I haven't seen yet and she said I can wear it if I want to. Maybe I will do that and save this for a date night?

Sunday, July 8, 2012

Building Dreams

June 23, 2012

July 7, 2012

July 7, 2012


Our house is coming along nicely. I am so blessed to have the brother-in-law's that I do. How amazing is it that they can do so much in just a few weekends? Five weekends and this is where it is? 

Friday, July 6, 2012

What hole in my shorts?

My infatuation with doily's may never end. I found another use for them- patching holes in shorts. I found a pattern that was intended to be used as a coaster. You can find it here. The only edit to this pattern I did was on round 6. I did as follows:
rnd 6: slip stitch to ch2 space, ch1, sc in space, ch8, sc in next ch2 space,ch5, *sc in next space, *(repeat around) slip stitch into first sc.stitch to top of ch3.
I crocheted this doily and then washed and dried both the doily and the shorts.
Next I just used a good thick thread to hand sew around the edge of the doily. (When I get into town again I'll get an iron on patch to put on the inside to help stabilize the denim behind the doily.
I'm debating adding a little bit of lace to the bottom of these shorts as they feel too short, but I'm worried my big ol' momma thighs may make the lace bunch up and just make things worse.
Doesn't this add such a nice feminine touch? I really like how it turned out!

What else can you use a doily for?


Thursday, July 5, 2012

skirt easy, dress hard


I am having a bit of trouble with my newest project. In 15 days I am in my best friends wedding. I was determined to find a dress in Naperville this past weekend, but I had absolutely no luck! So I decided to do what I do and make one! My friend's only request for our bridesmaid's dresses was grey, yellow, lace, vintage. Other than that she didn't care. So three of the bridesmaids went with yellow and two went with grey. I knew finding a lacy, grey dress would be a task in summer, but I took the challenge nonetheless. 

So I found this plain cotton fabric with this grey lace. I plan to add something small in yellow. I thought about a belt around the waist using a silk ribbon, but I don't know how that will look so I'll have to just wait and see what "feels" right.

This is the McCall's pattern M6508. In this pattern there are 19 pieces and multiple options for the dress. I chose the gathered top and the short gathered skirt. That is the top right dress without the strap. 

Now I am kicking myself for deciding to do this. I only spent about $30 on fabric so it will be an extremely price-savy dress if I can pull it off, but making a dress is hard work. I've made a dozen skirts, but never a dress. Pray for me. It's been a long day trying to figure this pattern out. In my opinion McCall's failed on the directions for this piece. I'm disappointed and a little exhausted from trying to make sense of it! The up side to this is it really is a gorgeous dress and the materials I chose are super easy to work with.

Let me also tell you this wedding is outside at the end of July! So super hot. Minimal clothing is a must, but I want to keep it classy. After all, I am a mother of two children and these pictures will be around for many, many years.